Tuesday, November 30, 2010

Challenge 98 - Non-traditional Christmas

Wow, it's hard to believe this is my final week as a Guest Designer with Late Night Stampers already. It has really been fun!! I am so honored to have been part of such a wonderful team! Thanks, Ladies :)

This week's challenge is to create a Christmas Card using non-traditional colors. We cannot use any green or red. So, I started out knowing I wanted to use Rich Razzleberry for sure. Then I decided to pair it up with Basic Gray (I really like them together) but wanted an even sharper contrast so I added Basic Black into the mix and topped it off with Whisper White to come up with this:


The complete list of supplies:

Stamp Set: A Wish For Peace, Peaceful Season

Cardstock: Basic Black, Basic Gray, Rich Razzleberry, Whisper White

Ink: Basic Gray, Rich Razzleberry

Accessories: Big Shot with Vintage Wallpaper Embossing Folder, Rich Razzleberry 5/8-inch Satin Ribbon, Stampin' Dimensionals

I inked up my stamp with Basic Gray ink and stamped off once before I stamped onto the Whisper White so I would have a lighter image. Then I stamped the sentiment over it with Rich Razzleberry. I love the way it turned out!! It is always so much fun to "think outside the box" and change things up a little bit. Although I love the traditional colors of Christmas, once in awhile something like this is just plain fun :)

I hope my card inspires you to do something a little different this Christmas season, too. Let me know if you do. I always enjoy seeing what others are creating. Thanks for coming by today and sharing my little piece of the "Non-Traditional Christmas" challenge. 'Til next time..............

Happy Stamping,

Laurie

Remember to get your mammogram!

Monday, November 29, 2010

New UStamp Event!!


Oh my gosh!! I am so excited to be invited back for the next UStamp With Dawn and Friends event!! This time we will be making projects using products from the new Occasions Mini and Sale-a-Bration Mini as well as all of the Hostess Sets!! This will be a wonderful way to end the year and I want you all to have the chance to join us!

Just head on over to UStamp With Dawn and Friends to take advantage of the early bird pricing now thru Dec. 4th. You will not be disappointed!!

Also, be sure to check out my online store for some great savings with the Online Spectacular going on right now. It all ends Nov 30th at 11:59 pm so don't miss out!!!

And if you have ever considered joining Stampin' Up as a demo or just to be able to purchase at the discount - you have until Nov 30th to join at 50% off!! This is a fabulous deal that has never been offered before!!! I would love to have you join my team. You can do that right on my website using the password you rock.

Now that Thanksgiving is behind us, I am looking forward to Christmas. It is my favorite time of the year. A bit different this year as I won't have snow (I will actually only miss it on Christmas Eve) but I still love it :) However, I am experiencing having the usual winter "cold" in my head so all is not lost - thank goodness for Alka-Seltzer Plus cold medicine!!

My team has grown over the past few months and I am looking to working with my new recruits to help them succeed! My monthly meetings are open to all demonstrators so if you want to join us, please feel free to contact me at laurie.gibson57@yahoo.com We would love to work with you!!

Thanks for coming by today. I promise to be back on track with projects now that I have made it through the past couple of weeks :) 'Til next time..............

Happy Stamping,

Laurie

Remember to get your mammogram!

Friday, November 19, 2010

Peaceful Season

Since the first time I saw the Level 2 Hostess Set Peaceful Season in the Holiday Mini Catalog, I have wanted it! This month I was finally able to earn it - thank you card class!! The images in this set are just gorgeous and add such an elegant feel to Christmas cards. They look so simple until you start adding them to cardstock :)

Mr. Brown (that's what I call the UPS man) delivered it to me on Wednesday and I couldn't get the box open fast enough - LOL!! Yesterday, I set my sights on using it and here is the first card I created:


This is how I finished the inside of the card:


The complete list of supplies:

Stamp Set:
Peaceful Season

Cardstock:
Cherry Cobbler, Brushed Gold, Very Vanilla, Deck the Halls Designer Series Paper


Ink:
Versamark


Accessories:
Big Shot with Petals-a-Plenty Embossing Folder, Heat Tool, Gold Emboss Powder, Victoria Crochet Trim, Mini Glue Dots, Gold Ziggy Pen (retired)


I cut the pine bough from a sheet of the Deck the Halls DSP and added to the top of the card with Mini Glue Dots before tying the Crochet Trim around. I used a chipboard template underneath the embossing folder to leave the flat oval in the center where I embossed the sentiment. I embossed the holly leaf on the inside of the card. You can't see it very well, but under the trim, there is a holly leaf entwined in the pine bough so I thought it would tie the two together. I used the gold end of the ziggy pen to add gold to the center of the poinsettias. SU no longer carries this pen but it is still available at your local craft store.

I liked this one so well that I decided I just had to do another one with my favorite sentiment from the set:


This is how I finished the inside:


I just love this dove - a beautiful symbol of peace. The holly branch is also cut from the Deck the Halls DSP for the front of this one. I started thinking afterward that the inside images probably could have been switched but "Peace" and doves just seem to go together :)

I hope you enjoy the cards I created for you and thanks for stopping by so I could share them with you. 'Til next time........................

Happy Stamping,

Laurie

Remember to get your mammogram!!

Wednesday, November 17, 2010

UStamp With Dawn Projects

I am so excited! My projects are featured today on UStamp with Dawn and Friends "Get A Jump on Your Jingle" so I can finally share them with you :) This is my third event as a Guest Designer and each one seems to be more fun than the last!! I had such a great time making this CD Folder album. They are so easy to make and can get addicting :) I can't wait to do some more of them. And now with the new Adhesive Sheets it will be so much easier because I can create my own diecuts!! Woohoo!!

OK, I hear you and I am calming down - LOL!! This time we had to create a card with a coordinating envelope and a 3-D project. These are my projects:


I had purchased some directions to make these folders from Patty Bennett so I tweaked a bit and used the Christmas Cheer Simply Scrappin' Kit to decorate my pages and inserts. I will have fun filling it with photos and am thinking I know a lot of people who will be receiving one for their Christmas photos, too :) There a lots of places to add your favorite Christmas memories:


I stuck with the same color combo and used some pieces from the Simply Scrappin' Kit to create my card as well. It will be the perfect accompaniment for the CD Folder when giving it as a gift :)


I can see of these being created for some weddings that are coming up next year, and my great-niece and nephew's birthday, and my great-great niece's birthday too. Wow, I guess I should get to work - LOL!! There are just so many great possibilities for these little mini scrapbooks.

If you would like the step-by-step instructions, just head on over to UStamp With Dawn and Friends and purchase the "Get a Jump on Your Jingle" event today. Along with my projects, you will receive 39 other 3-D projects and cards. I have already seen them and they are awesome!!!

I hope you enjoyed my projects - thanks for coming by so I could share them with you. 'Til next time.....................

Happy Stamping,

Laurie

Remember to get your mammogram!

Tuesday, November 16, 2010

Crazy For Cupcakes - Challenge 96

I am really enjoying being the guest designer for the Late Night Stampers this month. This week the challenge was to make a card with something sweet :) Well, naturally I dug out every stamp I have that has a cupcake on it - what could be sweeter? My favorite set for this kind of card is Crazy For Cupcakes. It is just so much fun!! And my favorite image is that whole stack of cupcakes!! I can just see them sitting on my counter :)

I dug them out of the box and this is the result:


I wanted to have some fun with them so I also brought out the glitter:


The complete list of supplies:

Stamp Set: Crazy for Cupcakes

Cardstock: Pretty In Pink, Real Red, Whisper White

Ink: Basic Gray

Accessories: Pretty In Pink 5/8-inch Satin Ribbon, Big Shot with Perfect Details Texture Plate, 2-Way Glue Pen, Dazzling Diamonds Glitter, Pretty In Pink and Real Red Markers, Ticket Corner Punch, Large Oval Punch, Scallop Oval Punch, Wide Oval Punch, Stampin' Dimensionals

It is difficult to see the soft impressions left by the texture plate on the large Whisper White layer. In person, it looks really cool. I know - I always say that!! I decided to add the ribbon so it would look like a present all wrapped up for the birthday person :) I really like the way it turned out - and I love the glittery frosting!! Well, I guess I should go bake some cupcakes now since they are all I seem to be able to think about - LOL!!

Thanks for stopping by and sharing my dessert :) I hope it inspireshas inspired you to create "something sweet". 'Til next time...........................

Happy Stamping,

Laurie

Remember to get your mammogram!

All Holidays

I just love the variety of stamps in the All Holidays stamp set. It covers pretty much everything and even celebrates friendship :) In my opinion, every day should be "friends day" because those are the people we spend our time with. I value my friends but probably don't tell them often enough. What makes them true friends is that they still like me anyway :) I am so thankful for all of them.

So, when I was designing my cards for card class last week, I thought it was only fitting to make a card to honor my friends. I love the sentiment from this particular stamp set so I chose it and created this card:


The complete list of supplies:

Stamp Set:
All Holidays, Punch Potpourri (Level 1 Hostess Set)

Cardstock:
Baja Breeze, Very Vanilla, Elegant Soiree Designer Series Paper

Ink:
Baja Breeze

Accessories:
Scallop Border Punch, Very Vanilla 5/8-inch Satin Ribbon, Paper Daisies, Baja Breeze Marker, Basic Rhinestones, Boho Blossoms Punch, Mini Glue Dots, Stampin' Dimensionals

I colored one of the Paper Daisies (love these!) with the Baja Breeze marker. I stamped the large flower from one of the pieces from the Punch Potpourri Level 1 Hostess Set and punched it out with the Boho Blossoms punch (this set coordinates with 4 of our punches). I attached it to the center of the paper flower with a Mini Glue Dot and than added one of the largest Basic Rhinestones to the center. I love that they already have adhesive on them - makes it much easier to attach them. You have to let the paper daisy dry completely if you color it so the glue dot sticks. But, they are so cool because you can make them any color you want by either coloring them with markers or dyeing them with reinkers. Too fun!!

Thank you so much for stopping by today and sharing with me. I consider all of my visitors among my friends and appreciate you all very much :) 'Til next time................

Happy Stamping,

Laurie

Remember to get your mammogram!

Sunday, November 14, 2010

Thank You Card for LNS Challenge 95

While I was designing the cards for my card class this month, I decide to "kill two birds with one stone." This week's challenge for the yahoo group I am guest designing for is to make a Thank You or Thanksgiving card. I have already shared a few Thanksgiving cards and I am a bit limited on stamp sets in that category, so I decided to do a Thank You card instead.

I wanted something that was simple and yet elegant. I had 8 ladies this month at my class so I needed some simple cards that would go together quickly. When I design this type of card, I like to do simple layering with texture. And what better way to add texture than the Big Shot and an embossing folder :) I know, you saw that coming a mile away - LOL!! So, I chose the fabulous Concord Crush from our In Colors and ended up with this:


The complete list of supplies:

Stamp Set:
Thank You Kindly

Cardstock:
Concord Crush, Naturals White

Ink:
Concord Crush

Accessories:
Big Shot with Vintage Wallpaper Textured Impressions Folder, Concord Crush 1/2-inch Stitched Poly Ribbon, Designer Label Punch, IModern Label Punch, Stampin' Dimensionals

I think this card is a perfect example of "less is more." Sometimes just a simple "thank you" with a little texture around it just pops off the card. I love using the many embossing folders that Stampin' Up carries and this one is absolutely gorgeous!! It reminds me of the wallpaper upstairs in my grandmother's house that was flocked with velvet. I used to love to touch it when I was a little girl and every time I use this folder, I just have to touch the paper and rub the texture :)

I know so many people that I could send this card to. I love it when I have the opportunity to brighten someone's day with a handmade card. And one like this is very easy to produce in any quantity :) I hope it has inspired you to give a simple "thank you" to someone you know.

Thanks for stopping by and sharing with me today. 'Til next time..................

Happy Stamping,

Laurie

Remember to get your mammogram!

Saturday, November 13, 2010

Cherry On Top Award!!


I was so excited yesterday when I opened my e-mail and found this blog award from fellow UStamp Guest Designer Penny Hanuszak! This is my very first blog award and I am so honored that Penny chose me to receive it - thanks so much, Penny!!! Be sure to visit Penny's blog for some wonderful ideas.

I have seen so many wonderful blogs and am just feeling giddy that someone likes mine this much :) I really enjoy blogging and as the award says...this is the cherry on top :) So, I am posting this on my blog and following the instructions to pass it on. No sense in keeping it just to my self when they are so many blogs out there to share with all of you.

The rules for the award are very simple:

1. Thank the person who sent it to you: Thank you so much, Penny!! I love your blog as well (http://pennytokensstampinspot.blogspot.com/)

2. Copy and paste the award onto your blog: Very simple to do :)

3. Share three things about yourself that you enjoy: Well, naturally I LOVE to stamp every chance I get, I love to sing 70's music so matter how off-key I am, and I adore the fact that chocolate and stamping just naturally go together :)

4. Pass the award to five others: Like Penny, I thought long and hard about this one because I have visited so many wonderful blogs. But there are so many of us who haven't been around that long so I want to give a few of them some encouragement. So here are my choices:
Thank you so much to all of the wonderful bloggers out there who share their ideas and talents with all of us - we really do appreciate each and every one of you :)

Thanks for stopping by and sharing this with me today. 'Til next time.................

Happy Stamping,

Laurie

Remember to get your mammogram!

Tuesday, November 9, 2010

ROYAL BLOG CANDY WINNER!!!!!

Congratulations to:

Allison Warrell


Thank you all so much for your wonderful comments during the Royal Blog Tour! I can't even begin to express what it means to me to hear from so many visitors. I am so grateful and humbled. And welcome to my new subscribers and followers. I am so happy to be chosen as part of your stamping experience!!

I entered the tour as an opportunity to reach new stampers and make new friends and I feel it was a huge success!!! I thoroughly enjoyed designing my projects and am so glad you all enjoyed them as well. I hope many of you will return as I will continue to create, inspire, and share what I love!!

'Til next time...............

Happy Stamping,

Laurie

Remember to get your mammogram!

Thursday, November 4, 2010

Welcome to Castle O'Laurie

Welcome to my castle. I hope you are enjoying the tour so far. Princesses have come from Kingdoms everywhere and there is so much to see!!

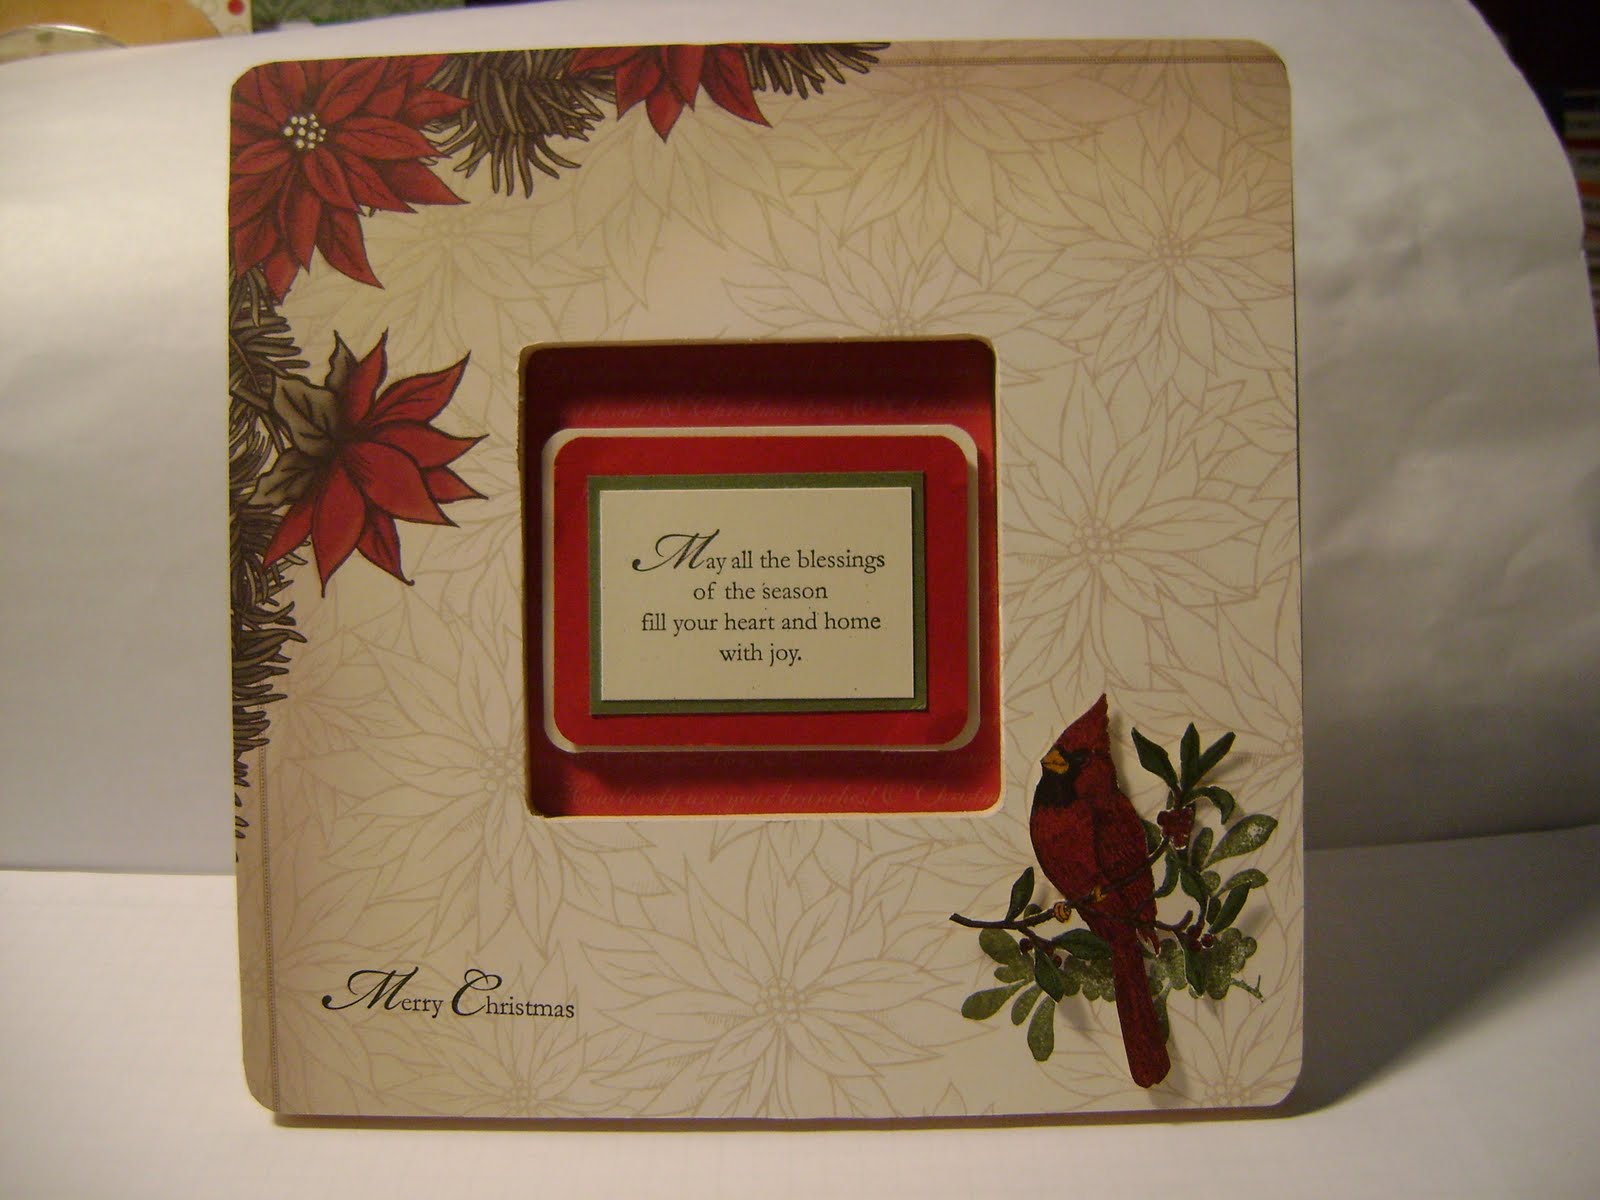
For thy tour of my castle, I chose to do projects using "A Cardinal Christmas". Very fitting for a castle, don't you think?? :) The first project I have to show you is an altered frame. I decorated the frame using the luscious Deck The Halls Designer Series Paper. I added the cardinal image to the frame using Stampin' Dimensionals over the stamped branch and matted the verse and mounted it where the photo would normally go. I think it turned out beautiful:


Here is a closer look at the cardinal (I apologize for the color variance, the lighting is not the best in a castle tower):


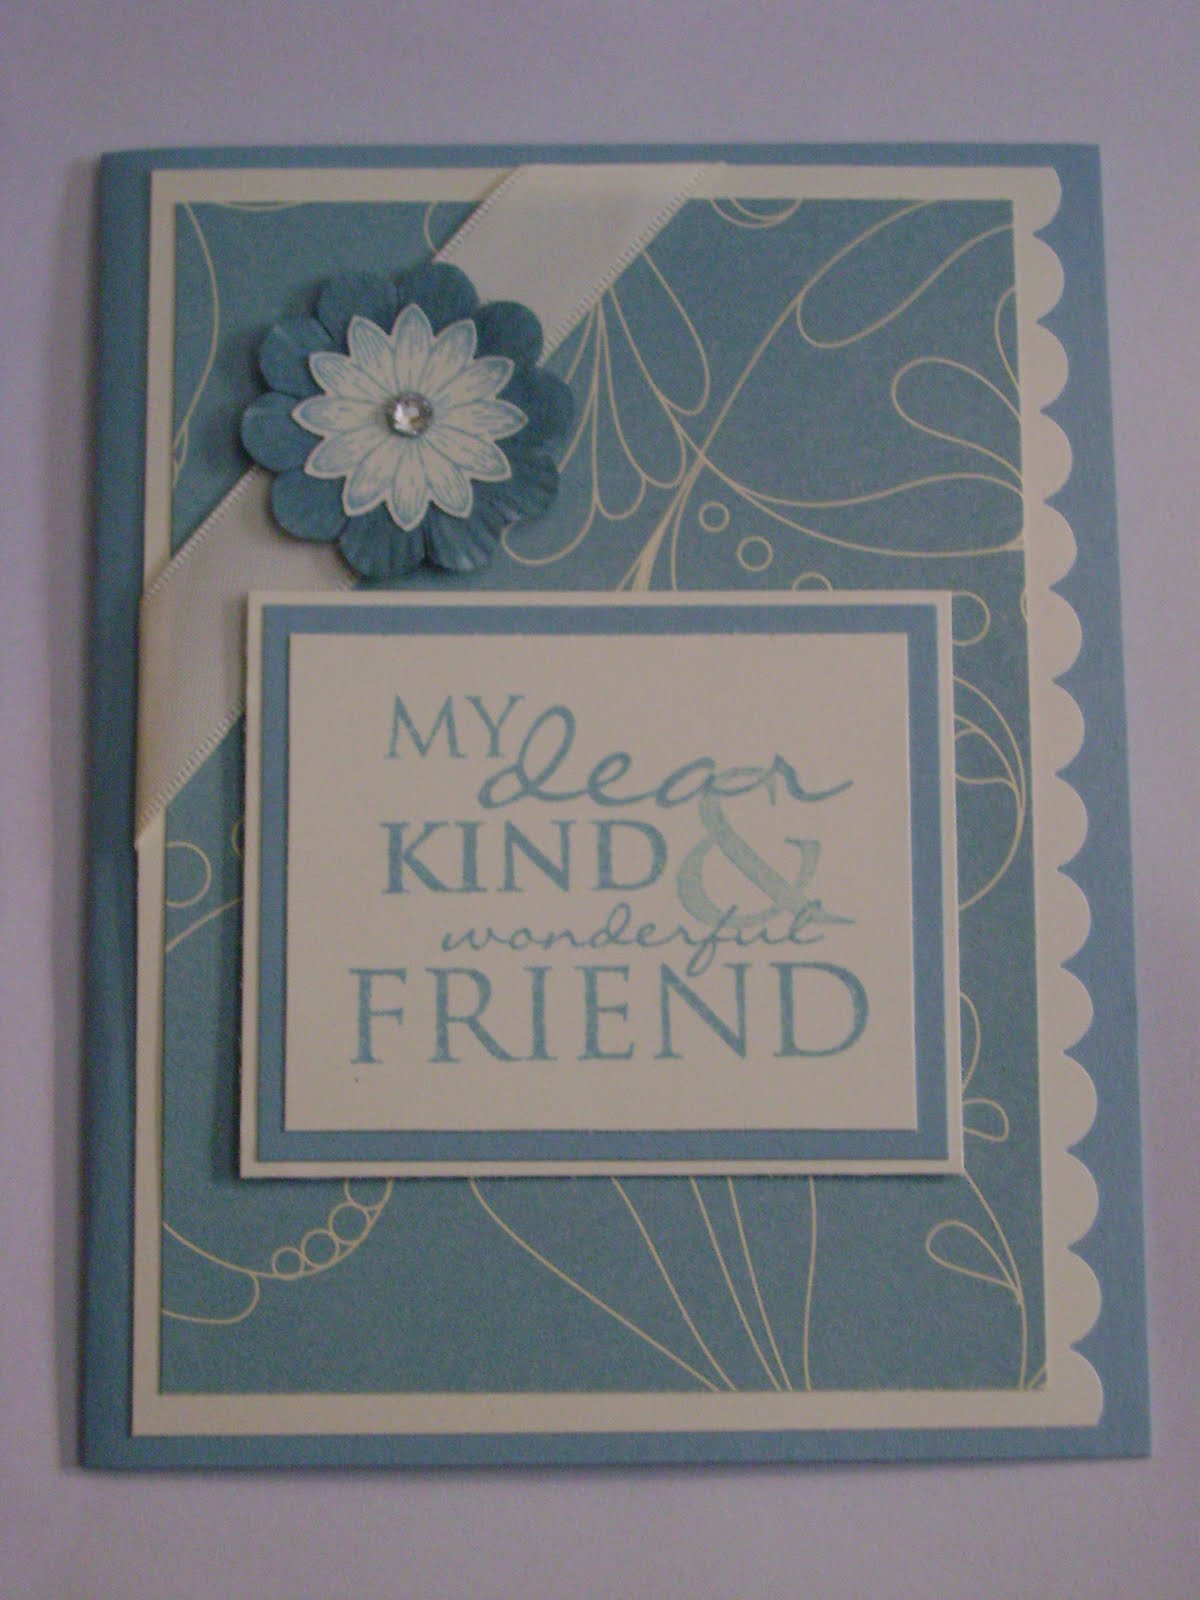
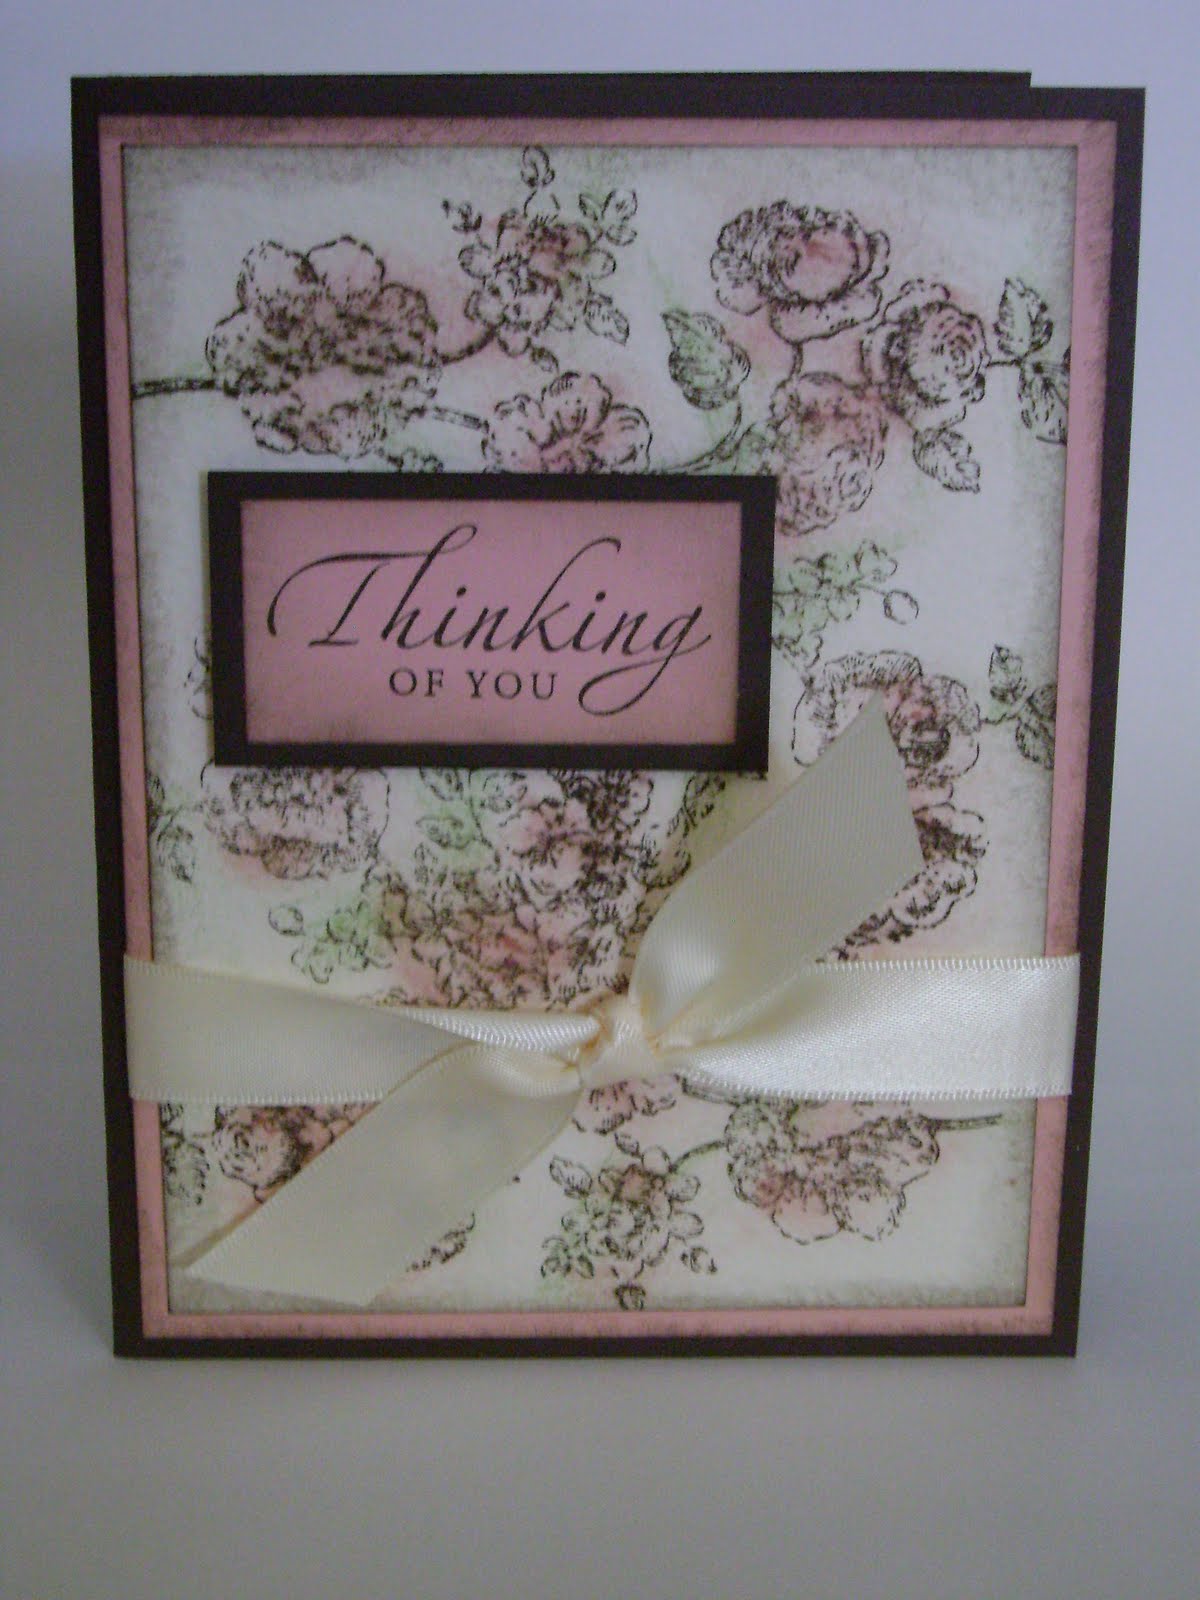
For my next project, I decided to make a set of cards and wanted a cute little holder to store them in. I went to the pattern dungeon and pulled out some ideas. I altered this a bit to fit my cards as they are layered with dimensionals and came up with this:


Of course I had to use my Big Shot with the Square Lattice Embossing Folder. My loyal subjects would expect nothing less :) They are well aware that it is my favorite!! LOL! The full set of cards is revealed when the folder is opened:


The cards show much more detail with a close-up. The cards and folder have a vintage look because they have been around the castle for quite some time:


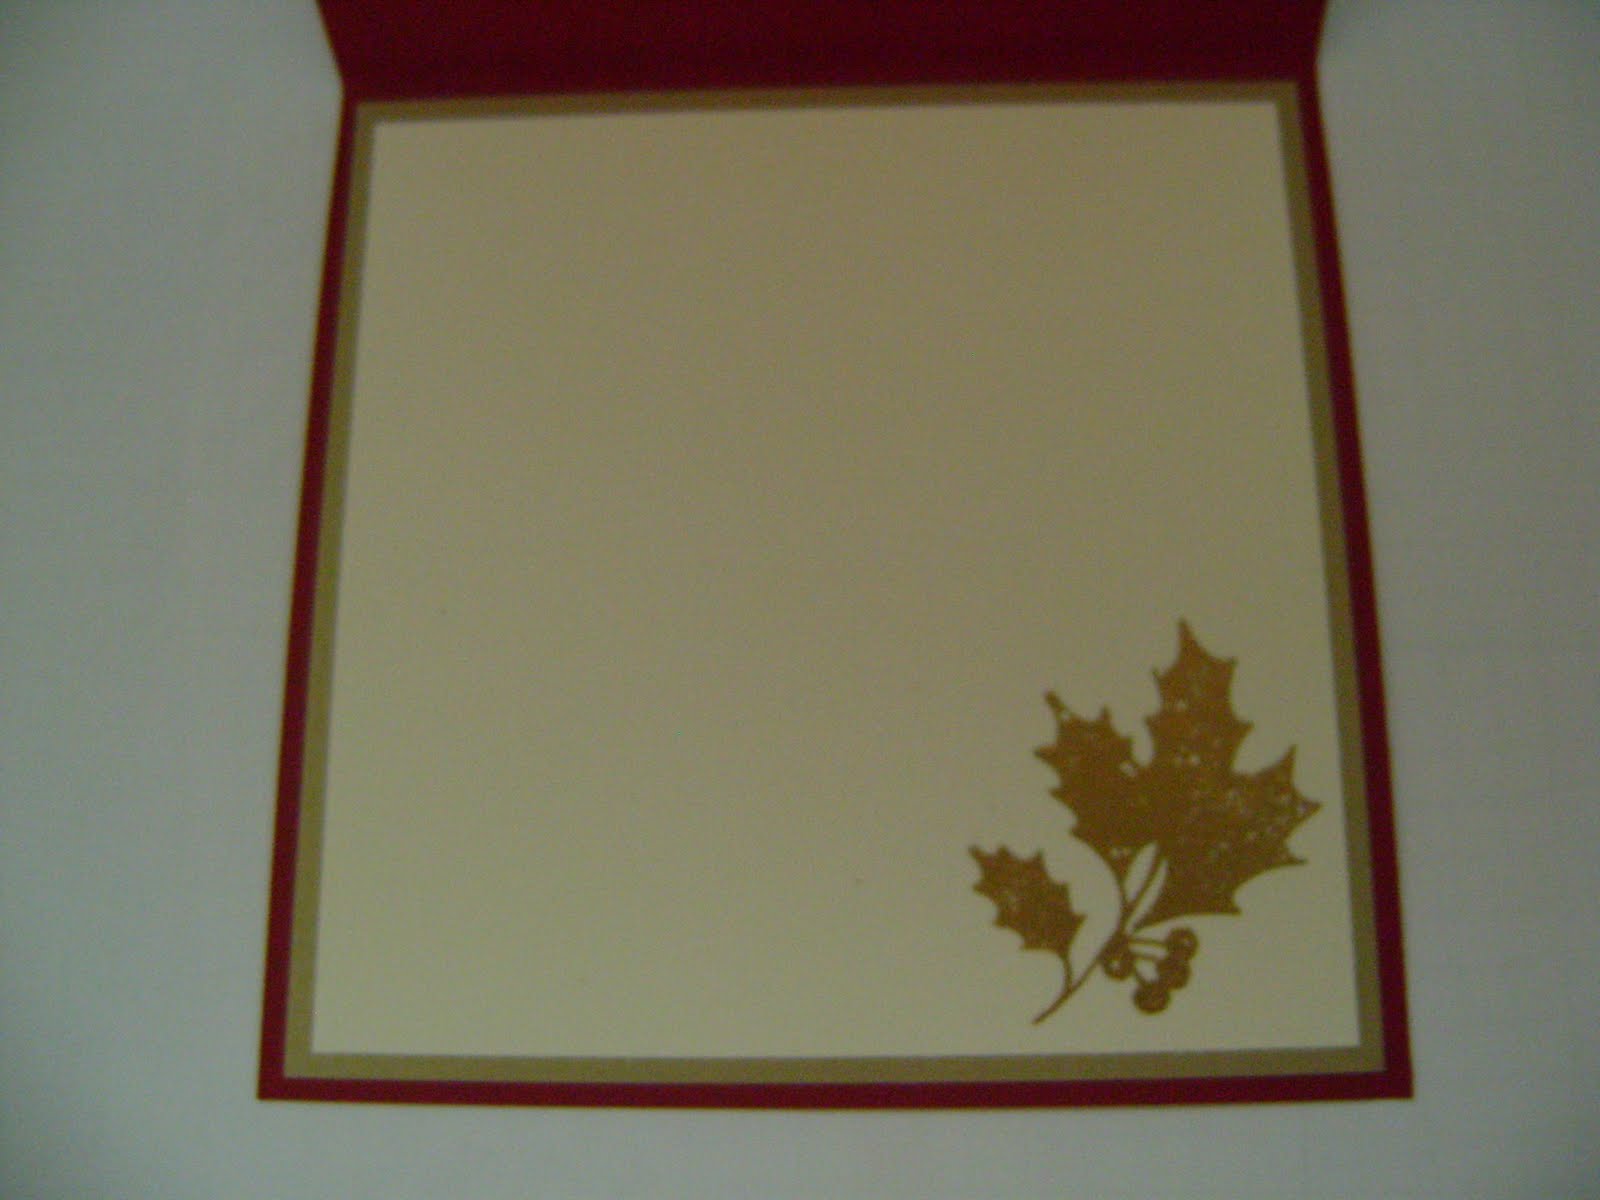
I finished off the inside of each card using the beautiful verse that comes in the stamp set:


I really must be giving these away so they do not start looking any older. So, I will offer them along with the frame as BLOG CANDY!!!

HEAR YE, HEAR YE!!!!! By order of Princess Laurie - If you would like to receive these projects in the mail, you must agree to the following creed:

1. E-mail me your name and address (or leave it in this comment)

2. Leave a comment on this post

3. In your comment, tell me which of these projects you like best

The winner will be announced following the tour so be sure to return to see if it is you! Good Luck and thank you so much for visiting my castle today!!! I hope you will continue the tour and visit the many beautiful castles we have assembled for you!!

'Til next time.............

Happy Stamping,

Laurie

Remember to get your mammogram!

The Final Clue

Here is the final clue for the Royal Blog Tour Paths game. I hope you have had fun collecting them and visiting each of the Honorary Queens' castles. Tomorrow you will begin your journey through 80 blogs and see lots of beautiful projects and have chances to win some blog candy!!! I will not be posting during the tour so all of you will have the opportunity to enjoy all of the princesses that have been assembled.


I am off on a trip to the mountains for the day. I will post tomorrow morning and then the Royal Blog Tour will go live in the evening. 'Til next time............

Happy Stamping,

Laurie

Remember to get your mammogram!

Wednesday, November 3, 2010

Vintage Floral and RBT Clue #5

As I told you yesterday, we explored the fun of sponging at my downline meeting this month. We did the fun Christmas card and I wanted to do something for all-occasion as well. I know it is so hard this time of year not to just make all Christmas cards :) It helps build the anticipation!! LOL! But, we need to remember that life still happens - there are still birthdays and the times that we need to just let someone know we are thinking of them.

And since it is difficult to do sponging without going vintage, I got out "the old standby", Elements of Style". It is always so perfect for this style. I wanted a very simple sentiment that could be used for various reasons so I chose one from Sincere Salutations to create this:


I know you are looking at this with astonishment, saying "she didn't use the Square Lattice Embossing Folder!!!!" LOL - I know :) This time I wanted to change things up a bit so rather than using a folder, I worked with the Watercolor Paper. It is difficult to see, but it has a texture that, when stamped, reminds me of stamping on tile. I don't know if this closer view really details that or not:


It is soooo cool in real life :) I really like how it looks - almost like if you were to touch it, it would feel like ceramic. So nice!!! I did my sponging on the flowers and leaves very lightly so it wouldn't smear the Early Espresso outlines. Not all of our inks are waterproof and sometimes they can smear if you are adding another color and rubbing it. I just dabbed and twisted the sponge without pressing too hard. I thwacked all of the edges with Early Espresso. And this is fun because you won't get in trouble for coloring outside of the lines - lol!! You can just let yourself go:)

The complete list of supplies:

Stamp Set: Elements of Style, Sincere Salutations

Cardstock: Blushing Bride, Early Espresso, Watercolor Paper

Ink: Blushing Bride, Early Espresso, Wild Wasabi

Accessories: Very Vanilla 5/8-inch Satin Ribbon, Stampin' Sponges, Stampin' Dimensionals

I like this because it doesn't take very many supplies to make it, which makes it very affordable for my customers to re-create. And it goes together very quickly but looks like you worked so hard :) I think the ladies at my card class this month will have fun making this.

And now, here is Clue #5 for the Royal Blog Tour - are you collecting them and guessing the names of the paths? You could win an extra entry into the grand prize drawing to get your very own Big Shot, My Digital Studio software, or a $100 Stampin' Up Shopping Spree!!! Tomorrow I will post the final clue and you can go to the Royal Blog Tour website to fill out your entry form.


Thanks so much for taking the time out of your day to visit my blog. I appreciate each and every one of you so much - you give me the motivation to continually try new techniques and styles. And it really is so fun!!! As always, I welcome and enjoy your comments. Hopefully, you get some inspiration in return. 'Til next time......................

Happy Stamping,

Laurie

Remember to get your mammogram!!

Tuesday, November 2, 2010

Delightful Decorations and Clue #4

Last night I held my November downline meeting. We have decided to try a different technique each month since my newest team member, Leni, is very new to stamping. This month was "sponging." I wanted to show her the vintage style but also something that you could sponge quickly and yet really WOW her our customers with. With the holidays knocking on the door, I thought a Christmas card would be perfect. So, I dug through my box of stamps for a favorite "go to" set - Delightful Decorations. And I brought a "secret ingredient" to come up with the first one:


We sponged the color onto Presto Patterns Specialty Paper in Riding Hood Red and Garden Green. And then we added the "secret ingredient":


Can you guess what it is??? That's right - Frost White Shimmer Paint. We put it very lightly on a sponge and spread it all over the piece of colored Presto Paper. If you put it on lightly, your colors show through with muted tones. And when you get the light at just the right angle, the shimmer is amazing!!! I LOVE using this paint! It comes out so awesome!! We layered the ornaments onto pieces that were cut with the Movers & Shapers and the Big Shot. I love how these little dies coordinate with our punches - very cool for layers!!!

The complete list of supplies:

Stamp Set: Delightful Decorations, Four The Holidays

Cardstock: Garden Green, Riding Hood Red, Very Vanilla, Whisper White, Presto Patterns Specialty Paper

Ink: Garden Green, Riding Hood Red

Accessories: Ornament Punch, Clear Rhinestone Brads, Real Red 1/8-inch Taffeta Ribbon, Very Vanilla 5/8-inch Satin Ribbon, Big Shot with Movers and Shapers and Holiday Windows die set, Stampin' Dimensionals, Stampin' Sponges

I really love this card!! I wish we could buy individual packages of each of the patterned sheets in the Presto Patterns Paper pack - LOL!!! It would make it so much easier to do this card in larger quantities - like for a stamp-a-stack :) But, I know.....you can't please all of the people all of the time :( Oh well, at least it will make a great hostess gift!!

So, how are doing with your Royal Blog Tour path name guesses so far?? Here is Clue #4:


There are only 2 clues left and then we go live!!! I am so excited for you to be able to see all of the beautiful projects! And there will be lots of chances for prizes and blog candy!!! Toooo fun!!

Thanks for stopping by today. Please feel free to leave a comment - I always welcome them and love to hear from my visitors :) 'Til next time.................

Happy Stamping,

Laurie

Remember to get your mammogram!!

Monday, November 1, 2010

Royal Blog Tour Clue #3

Here is Clue #3 for the Royal Blog Tour Jester game. Be sure to visit the castle of Honorary Queen, Monika Davis. How are you doing so far? Have you been able to guess the paths so far? There are still 3 more clues before we go live on Friday!! Don't miss out on your chance to win!!


'Til next time.........

Happy Stamping,

Laurie

Remember to get your mammogram!

Challenge 94 Gift Card Holder

I am so excited!! I have been invited to be the November Guest Designer for the Late Night Stampers Yahoo group that I belong to. Each Monday in November I will have a sample to show for the weekly challenge. This is going to be so much fun!!!

This week the challenge was to make a gift card holder. There are so many cute designs for these but I wanted to do something a bit different. Awhile back I had seen the directions for a Diagonal Double Pocket Card on Splitcoast Stampers. I have wanted to make one ever since but just hadn't gotten around to it. So, I thought this was the perfect opportunity to try one. This is how it turned out:


I used the Two Tags die and my Big Shot to add the gift card and a sentiment in the pockets and used one of the sentiments from the Afterthoughts Level 1 Hostess Set for the front image:


The complete list of supplies:

Stamp Set: Afterthoughts Hostess Level 1, Merry Crittermas

Cardstock: Baja Breeze, Real Red, Whisper White, Candy Cane Christmas Designer Series Paper

Ink: Basic Gray, Real Red

Accessories: Big Shot with Two Tags die, Dotto, Real Red 1/8-inch Taffeta Ribbon, Markers - Blushing Bride, Baja Breeze, Real Red Wild Wasabi

This was so easy to make. I didn't have an actual gift card so I had to use my Costco Card in the sample...LOL!! But then, it is like Christmas every time I go there because they always have really cool stuff :) I put some dotto on the tag before I tucked the gift card under the lip on the tag and it holds it perfectly. And the dotto rubs right off the back of the gift card when you remove it. The whole card base is made with one sheet of Designer Series Paper cut down to 8 1/2" x 11". I used the yummy Candy Cane Christmas DSP from the Holiday Mini catalog. You can get the directions here. It was so simple - don't know why I waited so long to try it!! You could use different DSP to adapt this gift card holder to any occasion. You can get all of the supplies you need to make yours here.

Thanks for coming by today and I hope you are inspired to create a gift card holder or even just a card using this very fun style. 'Til next time...............

Happy Stamping,

Laurie

Remember to get your mammogram!

Graphic 45 Mother's Day Card

We are still on lockdown here in Michigan, so I have been digging into my stash of papers. I had planned to use the beautiful Time To Flouri...