Monday, February 28, 2011

Take a Spin Awards

My part-time job at a local elementary school consists of working with a group of kids who have trouble focusing and staying focused. So, they are a bit behind the rest of the class. We work together in reading comprehension and math skills. The group that I do reading with struggles a bit more than the math group so I have been promising to make them something if they could stay focused every day for one week so we could actually make it through an entire reading lesson together. I was beginning to think it was a lost cause when suddenly, last week everything changed! For the first time since I started this job in December, those kids decided it was time to focus, focus, focus......and that is exactly what they did :) We got through an entire story in their reading book, answered all of the questions and completed their grammar packs! They were awesome!!!!

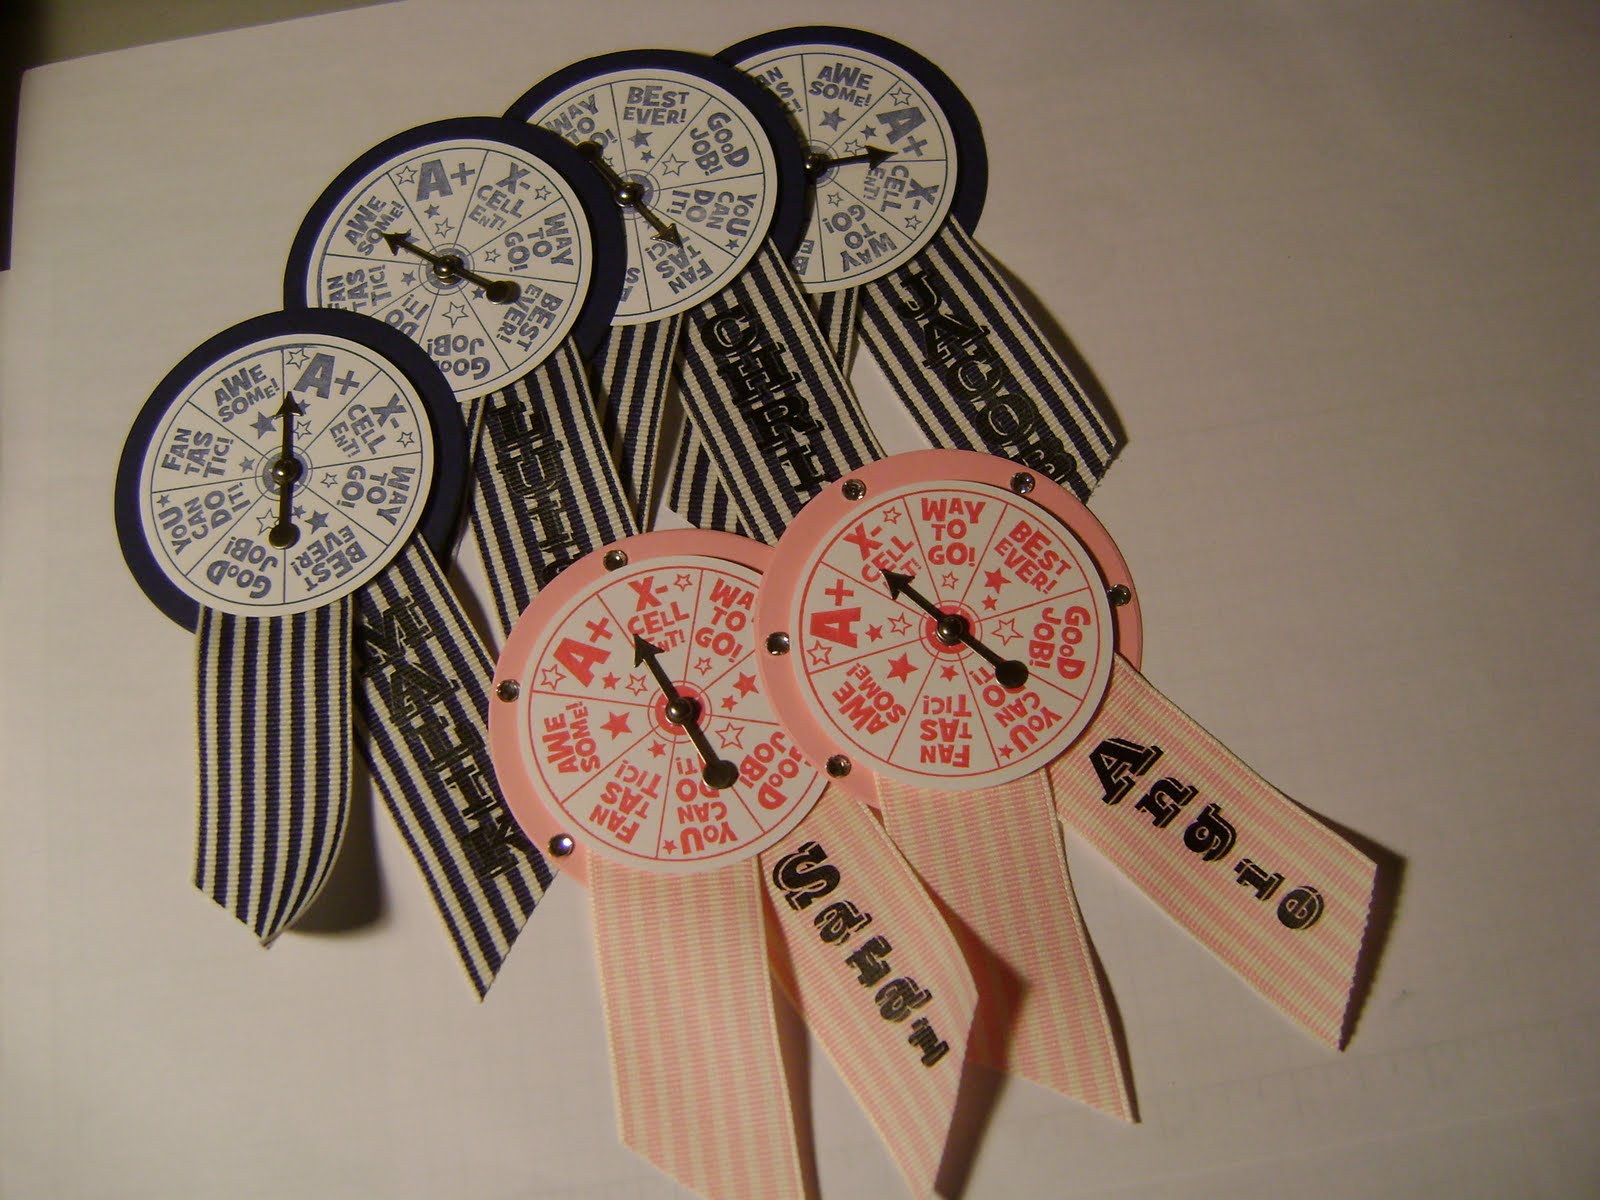
So, needless to say, it was time for me to put my money where my mouth is! The kids I work with are in the 4th grade so I wanted to make them something they would like and yet not think it was too childish...I know - not easy!! But, thank you Stampin' Up for the perfect stamp set - Take a Spin. I had seen some great little award ribbons made with this particular stamp from the set so I made these:


The complete list of supplies:

Stamp Set:
Take a Spin

Cardstock:
Night of Navy, Pretty In Pink, Whisper White

Ink:
Night of Navy, Melon Mambo

Accessories:
Big Shot with 3" Circle Die, 2 1/2" Circle Punch, Pretty In Pink 1 1/4" Striped Grosgrain Ribbon, Night of Navy 1 1/4" Striped Grosgrain Ribbon, Game Spinner Hands, Paper Piercing Tool and Mat, Basic Rhinestones, Vintage Type Rub-ons, Stampin' Dimensionals, Velcro Dots (non SU)

I decided to put their names on them at the last minute when I found these rub-ons next to the Rhinestones I added to the girls' awards:


I didn't have quite enough of the lowere case letters for all of them so I added the boys' names in capital letters since they didn't have any "bling" on theirs:


The stamp is so fun because you can place the little game spinner arrow over several different little praises for them:


I thought they turned out pretty cute but the true test was going to be actually giving them to my kids. To my surprise and excitement, they loved them!! All during our group work they wanted to know where they should point their arrows. I had added a velcro dot to the backside so they could stick them on their shirts if they wanted to and a couple of them even wore them out at recess. I was so happy they liked them. Now the extra 3 girls who work with us in math are working to earn one as well :) I say, as long as it keeps them focused and learning, I will make awards 24 hours a day if I have to!!

I am just SO proud of all of them and I am happy that I could do one small thing to let them know they are special. However, one of them was absent today and he had specifically asked if this was going to involve cupcakes........so, I guess the final test comes when he comes back to school. LOL!! So, keep me in your prayers :)

Thanks for stopping by and sharing with me today! I hope this has inspired you to create a special reward for someone special in your life :) 'Til next time..........................

Happy Stamping,

Laurie

Remember to get your mammogram!

Sunday, February 27, 2011

Gorgeous View and a CAS Card

Yesterday I was blessed enough to have my biggest workshop so far!!! OK, so it was only the second one I have ever had, but it was still the biggest....lol!! I was so excited for my hostess, Amy. She was able to get a bunch of fun products at no cost to her! She was thrilled! That's the best part of my job :)

Before I show the Make-and-Take that we did at Amy's workshop, I just have to share the gorgeous view from Lakeside this morning. We had quite the storm yesterday and although we just got buckets and barrels of rain here in Santee, the mountains got almost a foot of snow. They are beautiful today and I just love looking at them when they are snow-covered. I love snow....as long it is from a distance :) When I stopped at a park-and-ride in Lakeside, I was able to capture this:


The picture isn't even close to how it looks in real life. It really is soooo beautiful! Someday I want to have a camera that will bring landscapes to life. But, I need to hold alot more workshops to afford one, so for now I will just concentrate on creating cards :) This is the make-and-take we did at Amy's workshop yesterday:


The complete list of supplies:

Stamp Set: Baby Blossoms, Bring On The Cake

Cardstock: Crumb Cake (5 1/2" x 8 1/2"), Rose Red (4" x 5 1/4", 2 1/4" x 3"), Garden Green (1"x 5"), Very Vanilla (2 1/4" x 3"), Springtime Vintage DSP (2"x 4 3/4", 1 7/8" x 4 3/4")

Ink: Rose Red, Garden Green

Accessories: Scallop Trim Border Punch, Rose Red 1/2" Seam Binding, Stampin' Dimensionals

Everyone is ready for spring! Even those of us here in Southern California :) So, that has pretty much been the theme of things lately. And the Springtime Vintage Designer Series Paper is so gorgeous for spring projects! And I just adore that little frame in the Baby Blossoms stamp set. The Occasions Mini Catalog has so many coordinating items this time. It is so fun to experiment and put things together in lots of different ways. I am going to hate to see this one go away. But, I can have unlimited lifetime access to many of the products with My Digital Studio. Some of the stamp sets and the Springtime Vintage DSP have already been made available as digital downloads. You can get your copy here. I can't wait to have some fun with that :)

Thanks so much for stopping by today and sharing a little bit of winter and spring with me. I hope you have been inspired to take some photos and to put a little bit of spring in your greeting cards this week. 'Til next time......................

Happy Stamping,

Laurie

Remember to get your mammogram!

Wednesday, February 23, 2011

A New Challenge - The Nicest Things

So, my good friend, Sandi Dailey, introduced me to a new stamping challenge a couple of weeks ago. This week I finally made the decision to jump in with both feet :) I have been wanting to play with the Ice Cream Parlor Designer Series Paper and Quick Accents pack from the Occasions Mini. I decided to pair it up with the Nicest Things stamp set that I haven't used yet :) So, I studied the sketch (very simple and quick!!) which is this:..........


......and when I was all finished, I had this:


The complete list of supplies:

Stamp Set: The Nicest Things

Cardstock: Daffodil Delight (5 1/2" x 8 1/2", 3 1/8" x 3 5/8"), Melon Mambo (2 7/8" x 3 3/8", 2" x 5 1/4"), Pacific Point (3 3/8" x 3 7/8"), Whisper White (2 5/8" x 3 1/8"), Ice Cream Parlor Designer Series Paper (2 1/2" x 5 1/4")

Ink: Basic Gray, Daffodil Delight, Melon Mambo, Pacific Point, Soft Suede

Accessories: Ice Cream Parlor Ribbons & Buttons Pack (SAB), Blender Pens, Markers - Blush Blossom, Pacific Point, Daffodil Delight, Melon Mambo, Pear Pizzazz, Stampin' Dimensionals, Mini Glue Dots

I just love the bright colors in all of these accessories. They just brighten my day :) And aren't these two little girls cute??! The first time I saw them I thought they were so precious and absolutely perfect to send on a card to a close friend, sister, cousin,........lol - the list goes on :) The Ice Cream Parlor packs will only be around until the end of March so be sure to place your $50 orders here to get yours FREE!!

If you are a subscriber to my blog, you no doubt already received a notification of this post and noticed that it wasn't finished yet - gotta love technology!! I apologize for that - not quite sure why pressing the "enter" button to start a new paragraph would erase some of my typing and publish my post - go figure! :) But, I would like to thank you all for stopping by and visiting. I hope you will be inspired to join in the challenge as well. Check them out and see all of the great entries on the Try Stampin' On Tuesday blog. 'Til next time.............................

Happy Stamping,

Laurie

Remember to get your mammogram!

Sunday, February 20, 2011

Sweet Summer

Sale-a-Bration is one of my favorite "seasons." During February and March, for every $50 you spend with Stampin' Up, you can choose one of the Sale-a-Bration stamp sets FREE!! Who doesn't like free stuff??? This year we have some super cute sets along with some gorgeous Designer Series Paper, quick accent die cuts, buttons, ribbon, and even a CD with all of the Sale-a-Bration products for My Digital Studio!! How cool is that?!

I love them all (of course..lol) but one of my favorites is called Sweet Summer. It is full of cute little flowers and fancy stems. I went on a search for some summery colors and came up with this for my card class:


The complete list of supplies:

Stamp Set:
Sweet Summer, Something to Celebrate

Cardstock:
Regal Rose (5 1/2" x 8 1/2" , 2 3/4" x 3 1/4"), Pear Pizzazz (5 1/4" x 4"), Marina Mist (5" x 3 3/4"), Whisper White (2 1/2" x 3")

Ink:
Night of Navy, Pear Pizzazz

Accessories:
Ticket Corner Punch, Whisper White 3/8" Taffeta Ribbon, Markers - Marina Mist, Certainly Celery, Regal Rose, Stampin' Dimensionals

This card was quick and easy and bright and cheery - the perfect combination :) Definitely one I will be making more of this year! And it will be so fun to swap out the color combinations and the flower images. Hmmmmm....I may have to do a boxed set of these :) But, that's a whole other project...lol!!

Thanks so much for stopping in today and sharing my little "sweet summer" day. I always enjoy your visits :) 'Til next time....................

Happy Stamping,

Laurie

Remember to get your mammogram!

Saturday, February 19, 2011

Build-a-Blossom

A week or so ago, I saw the cutest little card posted by my good friend Sandi Dailey. She had used the Build-a-Blossom stamp set and coordinating punch from the Occasions Mini catalog and I just fell in love with it!! So, I decided to follow her basic idea to make a larger (5 1/4" x 5 1/4") card for my card class. I kept her color combo and background and came up with this:


The complete list of supplies:

Stamp Set: Build-a-Blossom, Occasional Quotes, Elements of Style

Cardstock: Garden Green 5 1/4" x 10 1/2" and 2 1/4" x 1 1/2", Night of Navy 5" x 5", 1 1/4" x 2" and some scraps to punch the large petals, Very Vanilla 1" x 1 3/4" and some scraps for the large petals, Springtime Vintage Designer Series Paper 4 7/8" x 4 7/8"

Ink: Garden Green, Night of Navy

Accessories: Corner Rounder Punch, Blossom Petals Punch, Springtime Vintage Big Designer Buttons, Tombo Multi-Purpose Glue, Stampin' Dimensionals

I used the Tombo glue to attach the flower petals and the button and added the layered sentiment with dimensionals. The swirly background is from the Elements of Style stamp set. I curled the top petals back with my bone folder so they wouldn't just lay flat. I think it gives more realistic dimension to the flower.

I am so thankful for my stamping friends who give me inspiration. I love sharing their creations too. You can find Sandi's card on her blog. She does AMAZING work and I love her vintage style. She is the one who actually got me hooked on it :) She is just the sweetest lady and I am so lucky to know her!! She is part of the same group that I am in (Ronda Wade's downline) and I miss her so much!! Thank goodness for blogs and facebook. We still keep in touch all of the time :)

Thank you so much for stopping by today so I could share Sandi's inspiration and my creation with you. 'Til next time...................

Happy Stamping,

Laurie

Remember to get your mammogram!

Monday, February 14, 2011

Dream Gardens

Oh my goodness!!! I am sure all of you must have thought I had fallen off the face of the earth! It has been 3 WEEKS since my last post!!! My, how we can lose track of time when we have a gazillion things going all at once :) Such has been my life for the past couple of months. But things have slowed down a bit so I can get back to what I love - sharing with all of you!!!

I just recently purchased the Dream Gardens stamp set because I love the image and the ornate oriental designs. But, I wasn't totally sure how I wanted to use it. And then I opened the Ice Cream Parlor Designer Series Paper & Quick Accents Pack from the Sale-a-Bration brochure. I was amazed!!! I chose the Melon Mambo print and came up with this for my February card class:


The complete list of supplies:

Stamp Set: Dream Gardens, Wonderful Favorites

Cardstock: Melon Mambo (4 1/4" x 11"), Pretty In Pink (4" x 5 1/4", 2 1/2" x 3", 1 1/8" x 3 1/8"), Basic Black (3 3/4" x 5", 1 1/4" x 3 1/4", 2 5/8" x 3 1/8", and some scraps for the leaves), Whisper White (2 1/4" x 2 3/4", 1"x 3")

Ink: Jet Black Stazon, Melon Mambo

Accessories: Ice Cream Parlor DSP (3 5/8" x 4 7/8"), 2-Step Bird Punch, Pretty In Pink 5/8" Satin Ribbon, Stampin' Dimensionals, Mini Glue Dots

I added the layered images with Stampin' Dimensionals and attached the leaves punch with the 2-Step Bird Punch using Mini Glue Dots. I love the way this turned out and so did everyone at my class :) It makes me so happy when they are pleased with their creations. That is what this business is all about - loving what you do and sharing what you love!! And what a great way to spend an afternoon with friends - just doesn't get any better :)

I am sure I will use this set more often now - such a beautiful image that can be added to a card for any occasion. And I have seen some awesome layouts for this. It will be fun to play and see what I can do with it.

Well, it feels so good to be back and thank you all for remaining loyal readers and followers!! I have missed you. Looking forward to more fun times. Thanks for coming by today and sharing my "Dream Garden." 'Til next time..................

Happy Stamping,

Laurie

Remember to get your mammogram!

Graphic 45 Mother's Day Card

We are still on lockdown here in Michigan, so I have been digging into my stash of papers. I had planned to use the beautiful Time To Flouri...